WARNING: Longest blog post ever! Well probably not but it's way long for me, but it's fun so if you have the time read on!
Well almost home-made. I tried to do as much as I could home-made but some I just couldn't get around. For example I couldn't make my husband the movie he wanted, or make my nephew the hoodie he wanted, so yeah you get the point.
WARNING: There are prices involved here so if you don't want to know how much I spent on you don't continue reading. You might feel bad that it's "cheap". But side note it really isn't cheap. I invested my time & love into making all of these gifts so please don't be offended by the price. Think of all the hard work that went into making it.
Sadly there are only a couple of tutorials on here but I'm pretty sure I have all the websites I got my ideas from and they all have tutorials or their own. So just follow along and anything you want to make yourself I'm sure you'll be able to figure out how; either from me or the person I got the idea from.
Trying to think of a way to organize this so I can keep track of what I did and what not. I think we'll go by families. For my dad I did a simple "Christmas Snack Pack". I'm sure you can guess what that is. I got all of his favorites snack and arranged them in a cute Christmas tin. I even threw in some lotto tickets (and he even won a couple bucks off of them!)
That's everything! He really liked it, so I was happy!
I think that was the easiest gift! Next up would be my wonderful mother. I know she loves wreaths so I made her a Christmas wreath, one that she could keep for a while. I got the idea from Pinterest (http://thriftydecorchick.blogspot.com/2009/11/hardest-easiest-diy-wreath-ever.html#.UIapkFHftvY.pinterest) hopefully these links work. I'll have to test them out. Anyways it was actually pretty easy. I got my ornaments from Wal-Mart and set to work. I think the hardest part was getting the wire to close off. I tried to make my own bow but that didn't work out so well so I got one from Wal-Mart for two bucks. I thought it was really pretty and she liked it so job accomplished!
Sadly I don't have a picture. But picture this (in your head) a pretty wreath with white, red and green ornaments on it. Some were sparkly, some were plain and some were shiny. All put together with a nice big red bow! Picture something like this:
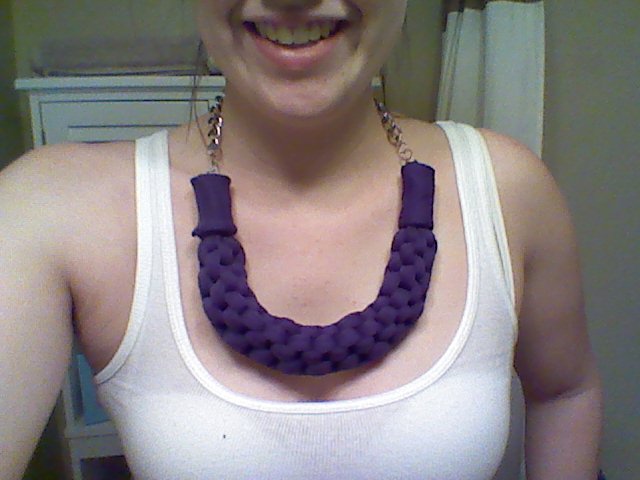
Let's see I got my sister Ashley a record player from Target and my brother-in-law a nut cracker so they're out. My sister Courtney I got her a Syracuse fleece blanket, which was her graduation present and her Christmas present was home-made. I made her scarfs and some pretty rings.
I actually have a tutorial for this. Well for the scarf part. There's also this video on youtube.com. Just search for "DIY half braided t-shirt scarf" and look for this user KaylynMatilda and you'll find the one where I orginally got it from. And the rings well here's the website for that: http://pixiedustcrafts.tumblr.com/post/28053151070/ric-rac-rose-ring-diy-tutorial-on-making-the-ring
That's one of the one's I made. I also did yellow, fushia, and purple I think.
I got the ric-rack for a little less then two bucks and the actual ring part was a little over two bucks. I was able to make two rings from one pack of ric-rack. So one ring only cost me around $3.50. I made four rings for her and four rings for my cousin so I spent about $30 on eight rings. You may think that sounds like a lot but it really isn't. If you've gone out recently and tried to buy a big ring they can cost around $10 for one! If I got eight of those I'd be spending $80! So I've saved quite a bit!
Now onto the scarfs! These were so fun to make. I made some for Courtney, and both my cousin's Heather and Amanda! All you need is an old t-shirt (a large or an extra large is best), a hot glue gun, and scissors. I got some of my t-shirts from Scottie (FREE!) and the rest were from Salvation Army and Target. I got two from Target for just $2.40. The rest that were from Salvation Army were two dollars or less!
So here's what you do:
Gather all your materials. Again you'll need one t-shirt, a hot glue gun and scissors.
Lay your t-shirt flat and you'll want to cut the top (just below the arm-pit) and the bottom hem off.
And you'll end up with a large square left, like so:
Next you're going to stretch it out. I just used my foot (don't worry I had clean socks on) and pulled and pulled.
The girls liked to help during this process too.
Once it's really stretched out you're going to lay it flat. Next you're going to cut tiny strips down the length of the shirts. I liked to do them about an inch in thickness. Don't cut all the way through the shirt just almost to the end.
Next you'll need to tie off a section of the scarf. It doesn't matter which part. I liked to do it right after strips. The part where everything is still connected.
After the knot you're going to cut. You want to stay close to your tie but obviously not cut into it.
Then once you lay it flat again you can see where everything is still connected. Now that it is tied off you can cut right through these strips.
Now that everything is cut you want to hold it around your neck. At this point you're looking to see where the braid should begin. You want the braid to begin a little under your collar bone area. Like so:
After you've found that spot you're going to tie it off with another scrap piece of fabric. Next lay it flat and separate the loose ends into three equal parts so you can get ready to braid.
Next holding it tight with whatever (my foot worked best) you're going to braid the loose ends together.
Once you've gotten your braid long enough (I put it up around my neck again to make sure, it helps you to see how long to scarf will be) you want to tie the braid off with another scrap piece of fabric.
And then cut off the excess ends.
Almost there! Next grab your hot glue gun and glue the two ends together. A little glue there:
Then stick together.
Now you're almost done! Next grab two pieces of scrap fabric, these should be wide (at least 2 inches) and also pretty long. You want to cover up the gluing process, and your knots throughout the scarf. Stretch those out to get the sides to curl up, like so:
This helps to make everything look neat and tidy when you're all done.
Then you're going to glue it other your ends and knots. Just put a little glue on the desired spot
and wrap your fabric around
Then it looks neat and pretty.
The end:
I made all of these (and another three that weren't in the picture)for just $15 dollars! Now if you're like me and like your scarfs you know that's a bargain!
(Sorry that some of the pictures are small. This took awhile to put together so I was not about to delete anything to make it perfect. I think you get the point from what I have here anyways)
Also please feel free to check out the video if this is too confusing! :)
Ok so up next we have the kids. Most of there things were bought, but I did manage to sneak in a couple of home-made things, like these hot coco mugs:
#1 Red Sox Fan Mug for Kody
Princess Mug for Adora
Complete with hot coco of course. I also made one for my two cousins Kenzie & Kylie. All you have to do is get a plain mug (I got mine from Wal-Mart for $1.75 each) some sharpies (I already had those) draw on your design and put them in the oven for half an hour at 350 and it becomes permanent!
These are Kenzie's and Kylie's:
I love these because ou can customize them to whatever the person likes. (Thanks pinterest!)
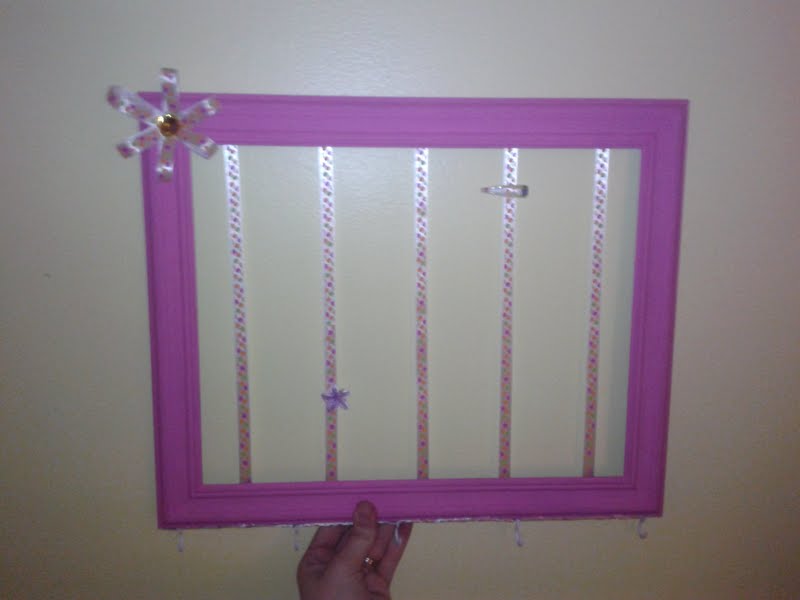
I also made Adora's hair tie holder. This was easy. I just grabbed a $5 frame from Wal-mart (11x14 size) took out the glass and painted it pink. Got some ribbon (only cost me a dollar!) hot glued the ribbon to the frame. Added some hooks on the bottom to hold her head-bands and then added a ribbon flower and that's it!
So for $7 I have a personalized hair tie holder! Done! Love!
(Pardon me, took a four day break while writing this.) Trying to get re-ganized again! So let's see next up we have the in-laws!
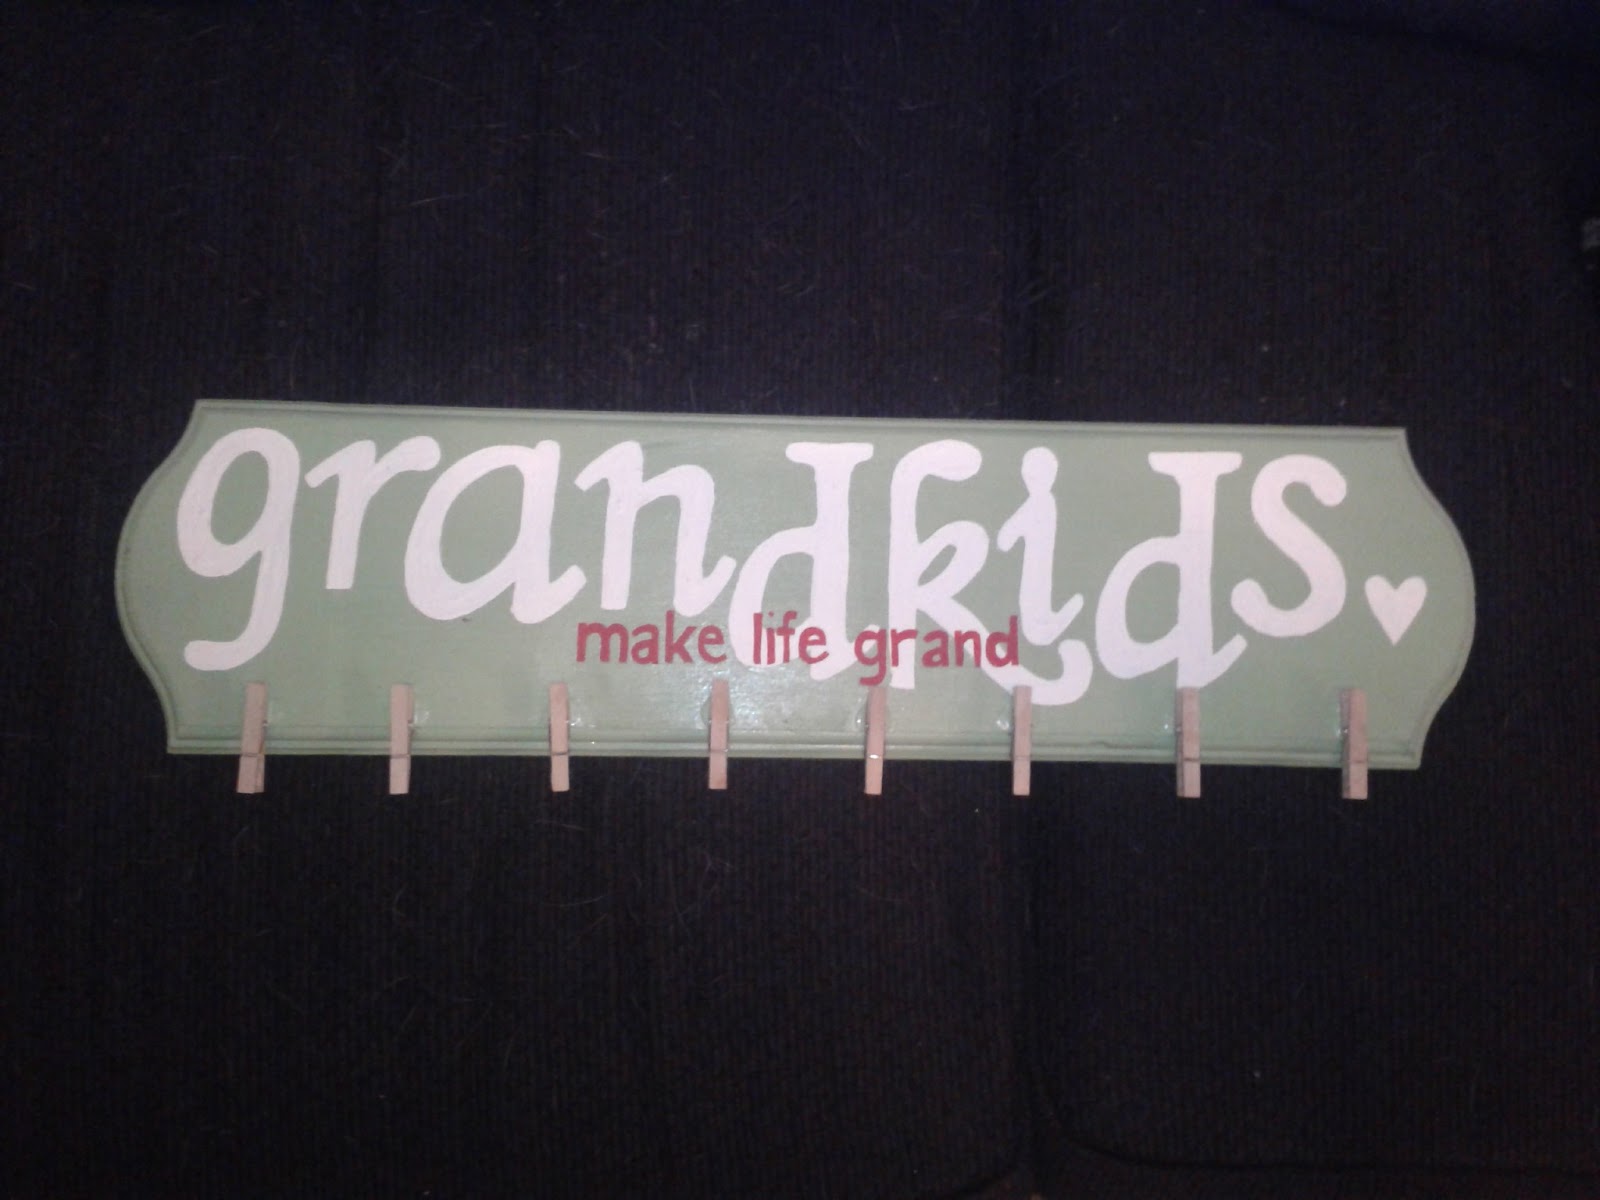
We got Dad Francisco a new subscription to Hot Rob so he could get some new inspriation for his own hot rod! For Mom Francisco I made a pretty sweet sign. Again idea from pinterest, not sure exactly the website but you'll see mine and you can search for it!
Well there's mine! I got the wooden plaque from Michael's craft store for $7! I got wooden letters for the grand kids parts but didn't like how they popped out so I traced them instead. I wrote the small letters myself (the "make life grand" part) on a piece of paper first and then traced them onto the wooden plaque. Everything was painted and I glued the clothes pins on (got those at Michael's for under three dollars I think). So this awesome gift cost me just under TEN dollars! Doesn't get much better than that! And now she has some place to hang all the precious pictures of her grand kids!
I got my bother-in-law some work gloves and wool socks. Hey don't hate that's what he told me he wanted people! And I threw in some jolly rancher chews because everyone loves candy! I got my sister-in-law an awesome cookie jar! Found it for $7 at Wal-Mart, grabbed some Martha Stewart's glass paint from Micheal's (I think they're like three dollars a jar but so worth it!), googled cookie jars for some inspiration and away I went. I decided to make a heart out of words. I put ingredients that you use in cookies (salt, sugar, brown sugar, flour, butter, etc.), things to describe cookies (yummy, sweet, etc.) and I put every ones name in it. I wrote "Julie's Cookie"s on the back. She loves to bake so what better gift to give than something to store all of her yummy creations in! I think she liked it! :)

For the boys, we got Logan Pokemon cards and Pokemon books that tell you all about each Pokemon, and Noah we got him a new hoodie and a new beanie (which he loved!) I would not even attempt to make them anything because let's face it, two pre-teen boys, they would probably hate it. Haha, but I'm ok with that.
Next we have my borthe-in-law Jeff. He had one request: a fleece Red Sox blanket. So off I went to Jo-Ann's fabric store and picked out some fabric. I got Red Sox for one side and solid red for the other side.
Another tutorial. This is the tie-blanket. It's super easy to make. All you need it two pieces of fleece fabric. I get two yards of each, this seems to be a good size for adults and something that kids can grow in to. Grab some scissors and you are ready to go!
There's my fabric. I lay it out flat (so be sure to have a lot of space) right sides facing out, one piece of fabric on top of the other just like you see above.
Then I just cut strips down the side, like so. I like to do it one side at a time so that way if I'm interrupted or need to move or put it away or whatever my strips don't get tangled together and it stays together.
Then you tie them together, pretty simple!
Sometimes the sides will tend to roll up on you, like you can see here.
All you have to do to fix that is simply stretch it out. Just pull the fabric, you'll hear some ripping but it's nothing to worry about. Trust me it will look fine in the end.
This is the part where some people have trouble; the corners. You don't have to cut all the way to the end, you can leave a little it's just going to be cut off anyways.
When you start your next side you seriously just cut it right off.
Just like that! Completely off and you can just throw those scraps away, you won't be needing them.
And there you have it. Continue around the blanket until all four sides are tied off and then you're done! How easy was that! (Wish this picture wasn't so dark!)
Now this can get a little pricey depending on the type of fabric you get. If you get a logo like the Red Sox or a licensed character those tend to run on the high side of the price range. But Jo-Ann's is always having sales and you can generally find a coupon so it shouldn't be too expensive!
So let's see my cousin Heather was my Secret Santa this year. Because we have such a huge family we do Secret Santa's between the cousins, it makes everything much easier! I love Heather and I'm so glad I got her this year! I decided to make her a crayon wreath and an ornament from one of her favorite baby's! None other than Mr. Ethan! (She works at a daycare and even though you shouldn't have favorites everyone does.)
For the crayon wreath (another pinterest idea, can you tell I love pinterest yet?!) I got a Styrofoam circle form Micheal's ($7)covered that in ribbon with some hot glue, then I took three boxes of 24 count of crayons ($4) and hot glue those on. I grabbed a letter ($2) for her first initial and hot glued that on, right on top of the crayons. Glue on some extra ribbon to hang it with and done! How simple is that?! And super cute! I made one for the lady I nanny for as well, they both loved them! And I loved how they came out for just under $15! Not too shabby! And again I forgot to take a picture! Wahhh! But picture something like this with a cute letter over top!

I also made her an ornament! This is where Ethan came in. I painted his fingers different colors and put his handprint on the ornament, then using paint I turned his fingers into crayons & wrote "#1 Teacher" on it for Heather! I got the ornaments at Michael's for just a dollar! I did some other ornaments too. I made one for each of the girls I nanny for. Lexi got reindeer, Addie got a peguin, Eva got a snowman, Gigi got Minnie and Tess got Mickey. I made ornaments for my cousin Amanda too. Every year I get her and Oumar an ornament for their tree! I also gave one to Mackenzie and Kylie!
Hard to see but there's the "#1 Teacher" one!
The snowman ornament
The reindeer ornament
Last but not least would be the people I nanny for. Two wonderful families who I love dearly! I got all the girls and ornament, nothing crazy. I also picked up two games at Wal-Mart (just 5 bucks a piece!) For the adults I made cookie trays with their names, super cute. I got the plate from Wal-Mart for just seven bucks and again took out my handy dandy sharpie and drew a cute design and done! Sticking with the Christmas theme, I made these:
One for each family! I think they turned out pretty cute!
I also made the parents a calendar from the girls, making pictures out of their handprints and footprints. Super cute and super easy. The girls loved doing it and there's so many different options as to make picture to make their handprint/footprint!
And that is it! This is probably the longest blog I've ever written. I think it took me two weeks to finish it. But it's done and I'm happy! Whoo hoo!
I've been itching to write about other stuff, but I knew I had to finish this one first, so I'm sure they'll be another one soon after this one! Happy New Year everybody!


